Microsoft SNDS and JMRP: monitor Outlook complaints early
Set up Microsoft SNDS and JMRP to monitor IP reputation and complaint feedback, so Outlook deliverability drops are caught before campaigns stall.
Why Outlook deliverability problems catch teams off guard
Outlook deliverability issues rarely come with a clear error. One week your cold emails get normal replies. The next week, responses go quiet. Teams start guessing: subject line, offer, list quality, or the sending tool. Often, the real problem is simpler: messages are getting filtered to junk or blocked before they’re seen.
A big reason this catches people is that they watch the wrong signals. Opens and clicks can be delayed, blocked, or inflated by privacy features and security scanners. Complaints are different. When someone hits “Report junk” in Outlook, that’s a strong negative signal. A small jump in complaints can hurt inbox placement fast, even if your dashboard still looks fine.
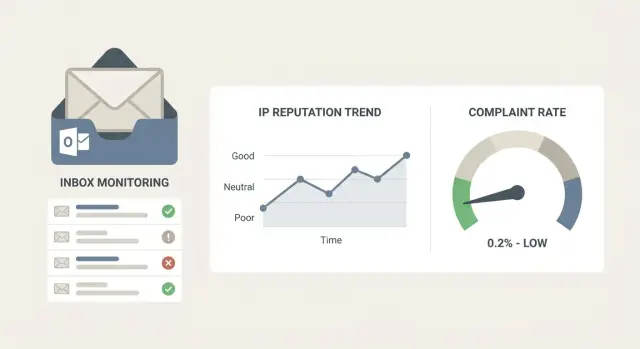
That’s where Microsoft SNDS and JMRP help. SNDS is a health view of the IPs you send from, showing whether Microsoft sees spam-like behavior, high complaint patterns, or other red flags. JMRP is the complaint feedback channel that tells you when Outlook users report your mail as junk, so you can react quickly.
These tools have limits. They only reflect Microsoft’s view (not Gmail or Yahoo). They focus on IP reputation and complaints, not a full explanation of what line in your email triggered filtering. Data can also lag.
Used together, they turn deliverability from a mystery into an early warning system. If Outlook volume suddenly drops, SNDS and JMRP help you confirm whether you’re dealing with reputation trouble, a complaint spike, or an infrastructure change.
SNDS vs JMRP in plain English
SNDS and JMRP are two different warning systems for Outlook and Microsoft 365 inboxes.
SNDS (Smart Network Data Services) is mostly about IP reputation. Microsoft shows how it sees the sending IP address: volume trends and spam-like signals. This matters even if your domain looks fine, because a weak IP can still push messages to junk or throttle delivery.
JMRP (Junk Mail Reporting Program) is about complaints. When a recipient clicks “junk” (or a similar complaint action), JMRP can send you a report so you can stop mailing that person and review what changed.
A simple way to remember it: SNDS answers “How healthy is my sending IP?” and JMRP answers “Who complained so I can remove them fast?”
One common confusion is domain vs IP reputation. Domain reputation is tied to your From domain, authentication (SPF, DKIM, DMARC), and sending behavior over time. IP reputation is tied to the server that transmits the email. If you send through a shared IP, other senders can affect you. With dedicated or tenant-isolated infrastructure, your reputation is more under your control.
Before setup, get clear on your infrastructure: which provider actually sends the mail, whether IPs are shared or dedicated, and who can prove ownership of the sending IP range.
What to gather before you start setup
Before you touch SNDS and JMRP, collect a few basics. This prevents the most common failure: registering the wrong assets and getting data you can’t act on.
First, list every sending IP that can reach Outlook.com, Hotmail, and Microsoft 365 inboxes. If you use multiple providers, shared pools, or rotated infrastructure, this is easy to get wrong. Confirm: “Which IPs actually deliver my outbound today?”
Next, make sure you have the right Microsoft account access for postmaster tools. Use an account your team will keep (not an ex-contractor’s login), and store recovery details somewhere safe.
Also confirm your sending identity is stable. A consistent From domain plus working SPF, DKIM, and DMARC gives Microsoft clean signals. If you keep changing domains, or you send from domains that aren’t fully authenticated, monitoring will be noisy and reputation will reset more often.
Finally, decide what you’ll do when complaints show up. Pick an owner, define when you pause or slow sending, and make “suppress immediately” the default. Write down where you log changes so you can connect cause and effect later.
How to set up Microsoft SNDS step by step
SNDS is Microsoft’s dashboard for how your sending IPs look to Outlook. If you plan to use SNDS and JMRP together, set up SNDS first so you can confirm Microsoft is actually seeing your traffic.
Setup steps
Use the account and IP details tied to outbound sending, then:
- Open SNDS in the Microsoft postmaster tools.
- Add each public sending IP used by your email provider (not your office network IP).
- Complete IP verification using the on-screen method.
- Wait for data to appear (SNDS is not real-time).
Once data shows up, create a simple mapping you can reference later: each sending IP - which domain, mailbox group, and campaign uses it.
If you see no data after a day or two, you probably added the wrong IPs (common when a provider rotates IPs or uses multiple pools).
How to read SNDS data without overreacting
SNDS is a dashboard, not a verdict. One bad day doesn’t mean you’re blocked. One good day doesn’t mean you’re safe. The goal is to spot patterns early and make small fixes before inboxing drops.
For outbound, focus on three signals: traffic (is Microsoft seeing what you think you’re sending?), complaint rate (a direct “people are unhappy” signal), and spam trap hits (often a list-quality problem).
Treat SNDS status colors as risk levels:
- Green: normal.
- Yellow: something changed. Check recent volume jumps, new lists, or a new template.
- Red: urgent. Pause scaling, reduce volume, and investigate list sources and authentication.
To separate a sudden change from slow drift, compare the last 24 to 48 hours with the prior 7 to 14 days. Sudden spikes usually point to one event. Slow drift often means reputation is wearing down from repeated sends, weak engagement, or missing warm-up.
How to set up Microsoft JMRP step by step
JMRP is Microsoft’s complaint feedback loop for Outlook.com and related consumer mailboxes. A complaint usually means the recipient clicked “Report junk” (or reported phishing). It’s not the same as an unsubscribe, and it can hurt deliverability quickly if you ignore it.
Before you enroll, decide where the reports should go. Use a dedicated mailbox your team actually monitors, or one your system can parse automatically.
A typical setup looks like this:
- Enroll the sending IPs you use for outbound.
- Set the destination email address for complaint reports.
- Confirm you can receive and store the reports (they’re usually machine-readable).
- Add a handling rule: suppress the complained-about recipient immediately and notify the deliverability owner.
After enrollment, test the full loop with a small, controlled send to Outlook addresses you own. Have one recipient mark the message as junk so you can confirm: report received, address suppressed, and someone notified.
What to do when you receive JMRP complaints
A JMRP complaint is a real person clicking “This is junk” in Outlook. Treat it like a fire alarm. The goal is to stop emailing that person fast, then find what caused the spike.
Start by suppressing the complainer immediately across every sequence and mailbox. Don’t wait for weekly cleanup. Make sure the address stays suppressed even if it shows up again in a new import.
Then do quick triage. A single complaint can be noise. A small cluster usually ties back to one campaign or audience mismatch. Identify the sequence and step that sent the email, check where the lead came from, and look for volume spikes in the last 24 to 72 hours. If complaints are concentrated in one list source or one message variant, pause that piece first.
After that, tighten hygiene: remove risky sources (old lists, scraped data, “just in case” imports), narrow targeting, and avoid sudden send increases. In cold outreach, a smaller, well-matched list beats a big list that doesn’t recognize you.
Finally, fix the message so fewer people reach for the junk button. Make it clear who you are, why you’re reaching out, and how to opt out in one step. Avoid vague intros, heavy hype, or misleading “quick question” openers.
A simple monitoring routine you can actually keep up
SNDS and JMRP work best when you check them on a schedule, not only when emails start landing in spam.
During an active campaign, a short daily sweep is enough:
- SNDS status: any change to a worse state than yesterday.
- Complaints: compare to your own baseline for that IP and campaign.
- Volume: sudden jumps up or down.
- JMRP: any spike tied to one message or one segment.
Then do a weekly review to spot trends: compare this week vs last week and note what changed (copy, list source, volume, domain, mailbox).
Keep your alert rules simple. For many teams, these are practical triggers: complaints doubling vs a normal week, SNDS flipping into warning, any trap indicators, or a sharp volume increase (around 25% to 50% week over week).
Common mistakes that make SNDS and JMRP useless
Most teams set up SNDS and JMRP once, glance at them, and then miss the signals that matter.
The biggest problem is monitoring the wrong IPs. If your provider rotates IPs, you add a new pool, or you move traffic to a different server, your dashboard can look “fine” while the real sending IP takes a hit. Keep a living list and update it after any infrastructure change.
Another mistake is treating SNDS like real-time alerting. It can lag. Making sudden changes after a single bad day often creates more volatility. Look for multi-day patterns, then compare them to what you changed.
Complaints also get misread. Teams blame “bad copy,” but targeting and list quality are usually the driver. If the wrong people get the email, even a polite message will draw complaints.
And don’t ignore the basics: if SPF, DKIM, or DMARC are off, Outlook is more likely to distrust you. If unsubscribes and removal requests aren’t processed fast, people hit “junk” instead.
Pre-launch quick checklist for outbound sends
Right before you launch a new domain, mailbox, or campaign, do a quick check:
- Authentication: SPF points to the right sender, DKIM is signing, and DMARC exists and matches your setup.
- Ramp-up: new mailboxes warm up first, and volume increases gradually.
- Suppression: unsubscribes, complaints, and hard bounces can’t be emailed again from any sequence or mailbox.
- Monitoring: SNDS is showing data for your sending IPs, and JMRP reports are being received and acted on.
- Pilot: send a small Outlook-only test to addresses you control and confirm inbox placement and replies.
Small misses here cause the most frustrating failures: everything says “Sent,” but meetings drop because Outlook is filtering harder.
Example: catching an Outlook deliverability dip early
A sales team launches a new outbound sequence on Monday morning. By Wednesday, replies look off: fewer responses from Outlook addresses and a couple of bounces that didn’t happen last week.
They check SNDS and see two changes: IP status moved from green to yellow, and complaint signals are higher than normal. Nothing looks catastrophic, but it’s an early warning that inbox placement is slipping.
They isolate the cause by changing one thing at a time: pause the new segment (new list source), keep volume flat, drop the most aggressive subject line, and send from the most established mailbox while the new one continues warming. Over the next day, JMRP complaints drop and SNDS stops trending worse. That points to a specific campaign setup issue, not a permanent Outlook block.
They clean the segment, soften the opener, and ramp volume back slowly. Over the next few days, SNDS returns to green and the Outlook reply rate stabilizes.
Next steps: make monitoring part of your outbound workflow
SNDS and JMRP only help if someone owns them and acts quickly. Pick a single owner, set simple thresholds, and keep a lightweight change log so you can connect deliverability shifts to what you changed.
It also helps when the moving parts are in fewer places: domains, mailboxes, warm-up, sequences, and reply handling. If your team uses LeadTrain (leadtrain.app), that all-in-one setup can make it easier to act on what SNDS and JMRP are telling you, because the sending infrastructure and campaign controls live together.
FAQ
When should I check SNDS instead of guessing what changed?
Start with SNDS when Outlook reply volume drops suddenly, inbox placement worsens, or you suspect your sending IP is being throttled or filtered. It’s best for spotting IP-level issues like unusual volume patterns, complaint signals, or trap hits that can affect delivery even if your copy looks fine.
When is JMRP the right tool to focus on?
Use JMRP when you want to know exactly who clicked “Report junk” so you can suppress them immediately. It turns complaints into an actionable list, which is often the fastest way to stop damage from spreading across a campaign.
What’s the simplest difference between SNDS and JMRP?
SNDS mainly answers, “How does Microsoft view my sending IP?” JMRP answers, “Which recipients complained?” They work together: SNDS shows the risk pattern, and JMRP gives you the specific addresses to remove so you stop generating more negative signals.
Why does SNDS show no data even though I’m sending emails?
It’s almost always because you registered the wrong IPs. Many email providers use multiple pools or rotate infrastructure, so the IP you added isn’t the IP actually sending. Confirm the exact public sending IPs used for Outlook-bound traffic and update your SNDS list when infrastructure changes.
How do I read SNDS without overreacting to normal fluctuations?
Don’t panic after one bad day. SNDS can lag, and day-to-day variation happens. Look for patterns over a few days, compare the last 24–48 hours to the prior 7–14 days, and match changes to what you altered recently (volume, list source, template, new domain, new mailbox).
What should I do the moment a JMRP complaint arrives?
Suppress the complainer immediately across all sequences and mailboxes, then investigate what drove the spike. A small cluster usually points to an audience mismatch, a new list source, or a specific step in a sequence rather than a random “bad day.”
Will SNDS and JMRP explain deliverability problems outside Outlook?
No. SNDS and JMRP are Microsoft-only signals, so they won’t explain Gmail, Yahoo, or other inbox behavior. They also won’t tell you the exact line of copy that triggered filtering; they’re best used as early warning indicators tied to reputation and complaints.
Do SPF, DKIM, and DMARC matter if I’m already watching SNDS and JMRP?
Verify SPF points to your actual sender, DKIM is signing, and DMARC exists and matches your setup. If authentication is missing or inconsistent, monitoring gets noisy and Outlook has more reason to distrust your mail, even if your targeting is good.
What are the most common setup mistakes that make these tools useless?
The most common issue is adding the wrong assets: tracking office or VPN IPs instead of sending IPs, or missing new pools after a provider change. Another is treating SNDS like real-time alerting and making big swings based on one data point instead of multi-day trends.
What’s a monitoring routine my team can realistically keep up with?
Check SNDS status, traffic volume, and any complaint signals once per day during active sends, then review trends weekly. Keep triggers simple, like a sudden volume jump or a complaint spike compared to your normal baseline, and log every change you make so you can connect cause and effect.